Text to Video · No Uploads
Start with a Prompt
Describe a coastal cycling scene and generate it without source media.
View the text exampleVideo Creation Guide
Learn how to create your first Kling 4.0 video on kling-4.art. Follow practical examples to write prompts, use references or keyframes, choose video settings, and improve your results.
Start simple
Text, images, or keyframes
Follow along
Real prompts and settings
See the result
Playable example videos
Choose a Walkthrough
Start with a prompt or choose an example with images, keyframes, or voice. Each walkthrough ends with a video you can play and download.
Text to Video · No Uploads
Describe a coastal cycling scene and generate it without source media.
View the text exampleOmni Reference · Two Images
Combine a product image and a setting to guide a short video.
View the product exampleKeyframes · Three Images
Set the opening, middle, and ending moments of a reunion scene.
View the keyframe exampleOmni Reference · Images + Voice
Use two images and a voice sample to guide an instructional video.
View the explainerBefore You Start
Begin with a simple idea. Source media is optional in Text to Video and depends on the other modes.
Choose one subject and action. For example, a cyclist rides along a coastal road while the camera follows from the side.
Prepare clear images if a character, product, or setting needs a particular look. Give each reference a purpose.
Choose 3–30 seconds and an aspect ratio that suits the destination. This generator currently offers 720p and 1080p.
Sign in and check your balance. The estimate appears before submission; reference video length can affect it.
Prompt Writing
Start with what viewers should see. Add action, camera movement, sound, and details that should stay consistent.
Prompt tip 1
Too vague: “A cinematic coffee scene.”
Better: “A matte ivory ceramic mug sits on a wooden table beside a sunlit kitchen window.”
Identify the object, material, and setting.
Prompt tip 2
Too vague: “Make the action look natural.”
Better: “A hand enters the frame, lifts the mug, pauses, and places it back on the table.”
Give the action a clear order.
Prompt tip 3
Too vague: “Smooth camera movement.”
Better: “The camera slowly moves from a medium three-quarter shot toward the mug's handle.”
State the starting view and direction.
Prompt tip 4
Too vague: “Nice lighting and audio.”
Better: “Warm morning light enters from the left, with quiet room ambience and a soft ceramic sound as the mug touches the table.”
Include only audio instructions relevant to your chosen mode.
Prompt tip 5
Too vague: “Keep the product consistent.”
Better: “Preserve the mug's ivory color, curved handle, proportions, and speckled finish throughout the shot.”
Name the details you want preserved.
A matte ivory ceramic mug sits on a wooden breakfast table beside a sunlit kitchen window. A hand gently lifts the mug, pauses, and places it back on the table. The camera slowly pushes in from a three-quarter view, keeping the curved handle visible. Warm morning light falls across the ceramic surface. Preserve the mug's original shape, ivory color, handle design, and subtle speckles. Quiet room ambience, one continuous camera movement, no added products or text.
Change one important instruction at a time when refining a prompt so you can see what changed.
Reference-Based Creation
Example: Ceramic Mug Product Showcase · 10 seconds · 16:9 · 720p
1
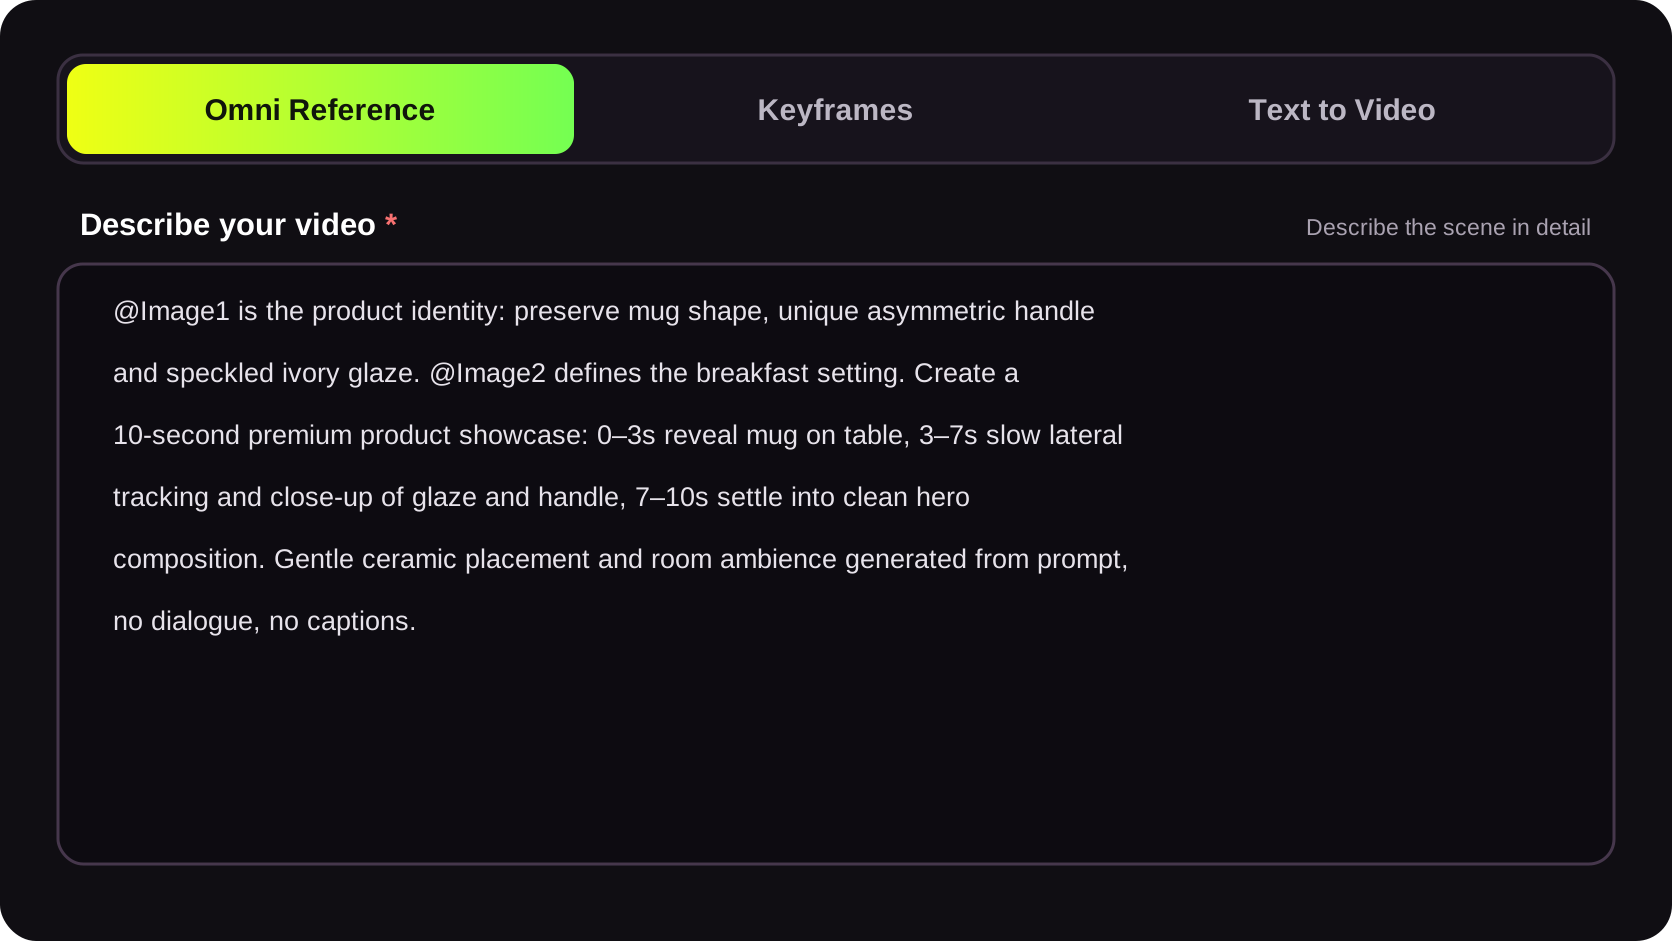
Select Omni Reference. Describe the mug, the breakfast setting, and how the 10-second video should unfold.
2
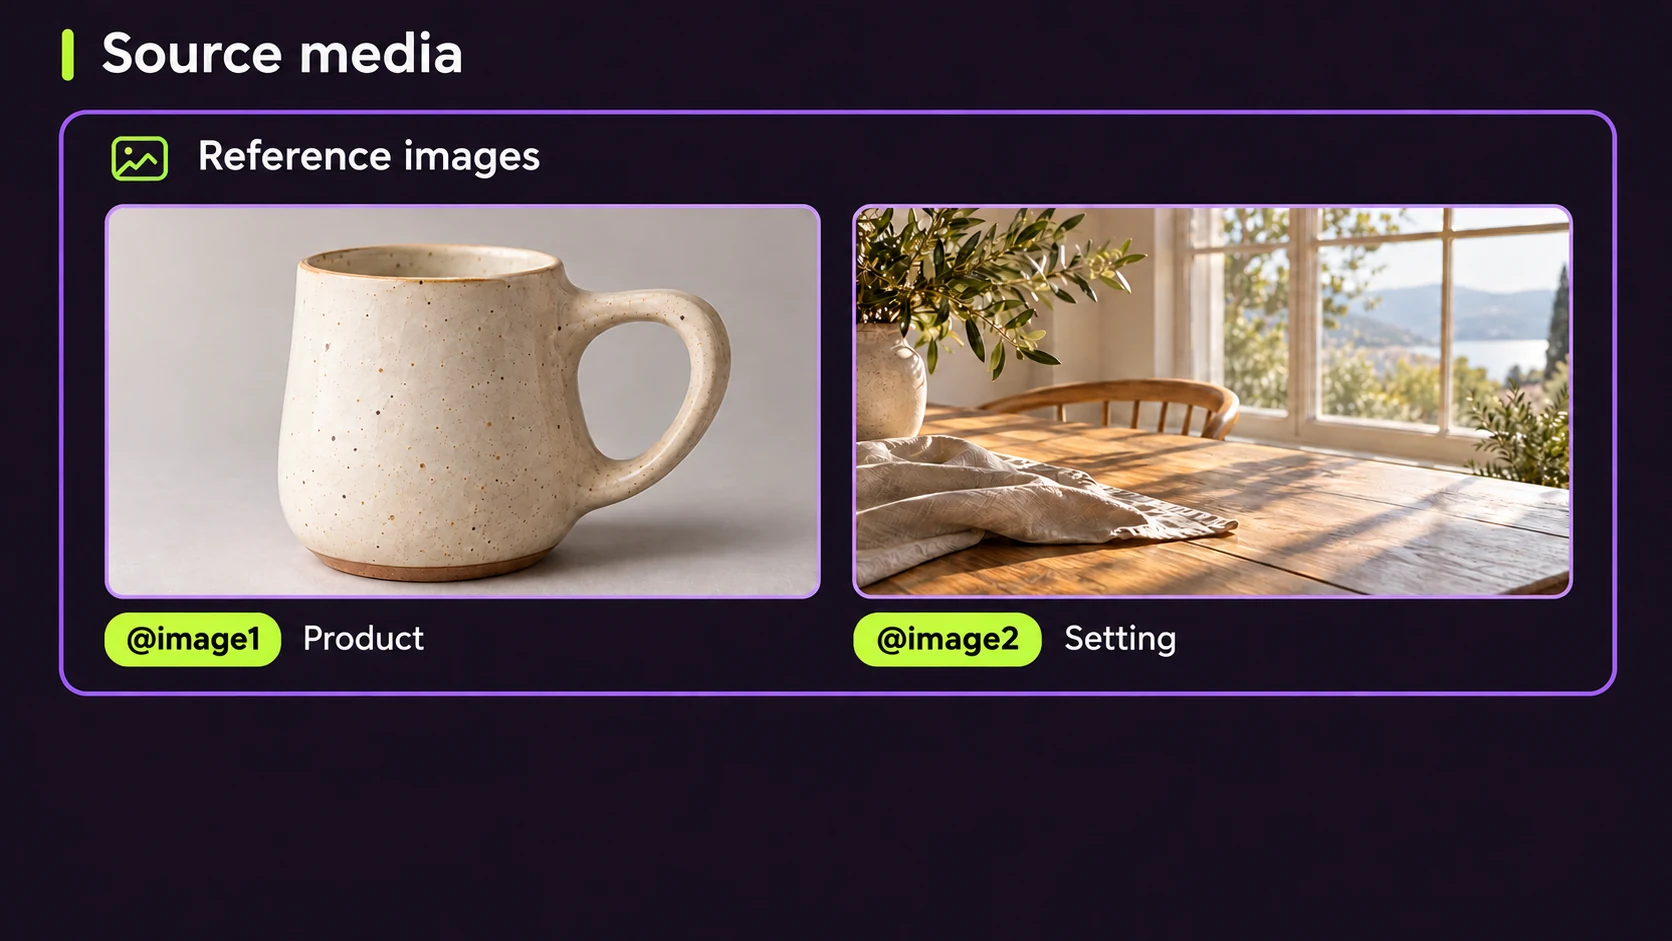
Upload the mug as the product reference and the table as the setting. Check that each image has the right label.
3
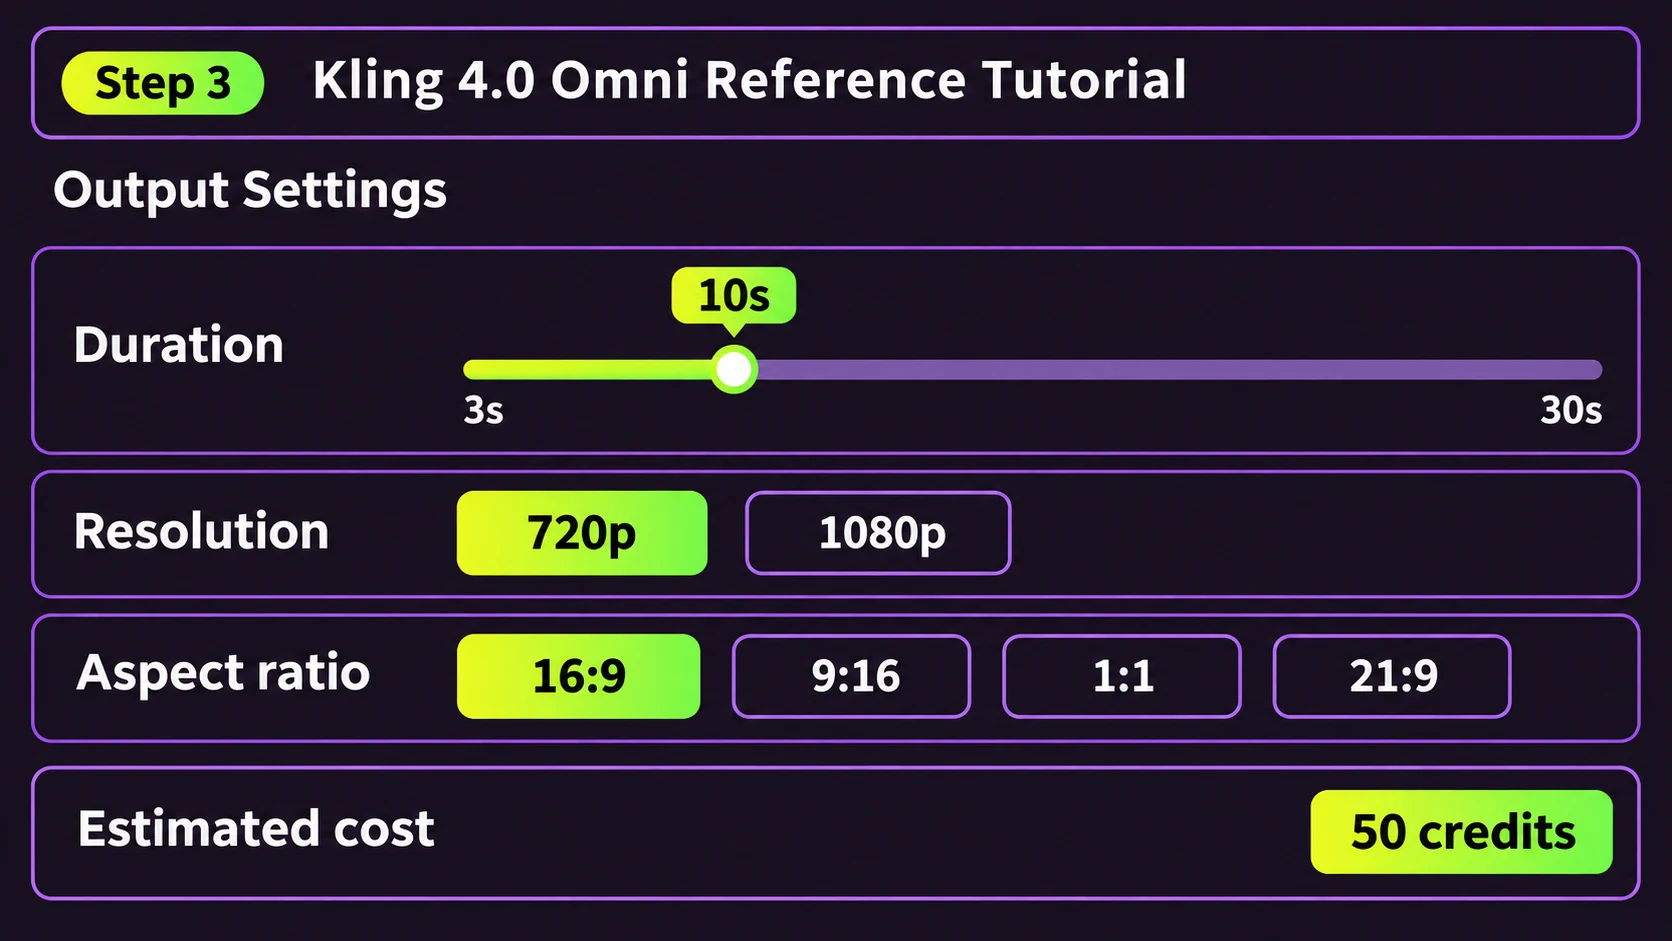
Choose 10 seconds, 16:9, and 720p. Check the estimated 50-credit cost before generating.
4
Play the finished video. Compare the mug and setting with your inputs, then download the result.
Timeline Control
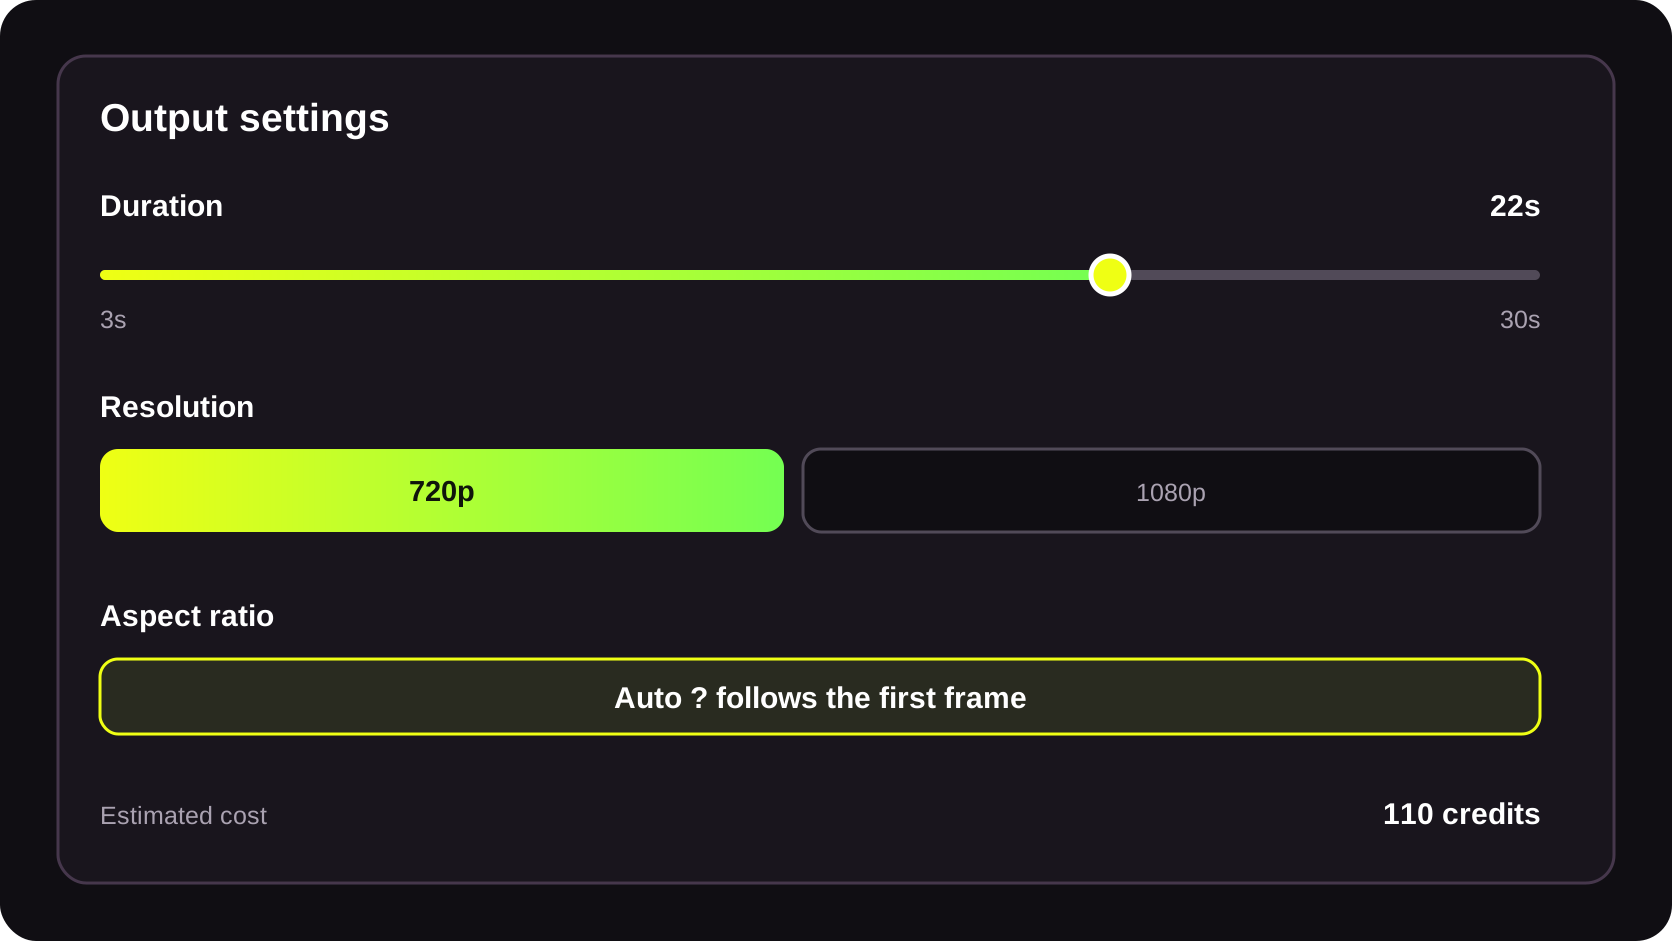
Example: The Last Train Reunion · 22 seconds · 720p · aspect ratio follows the first frame
1
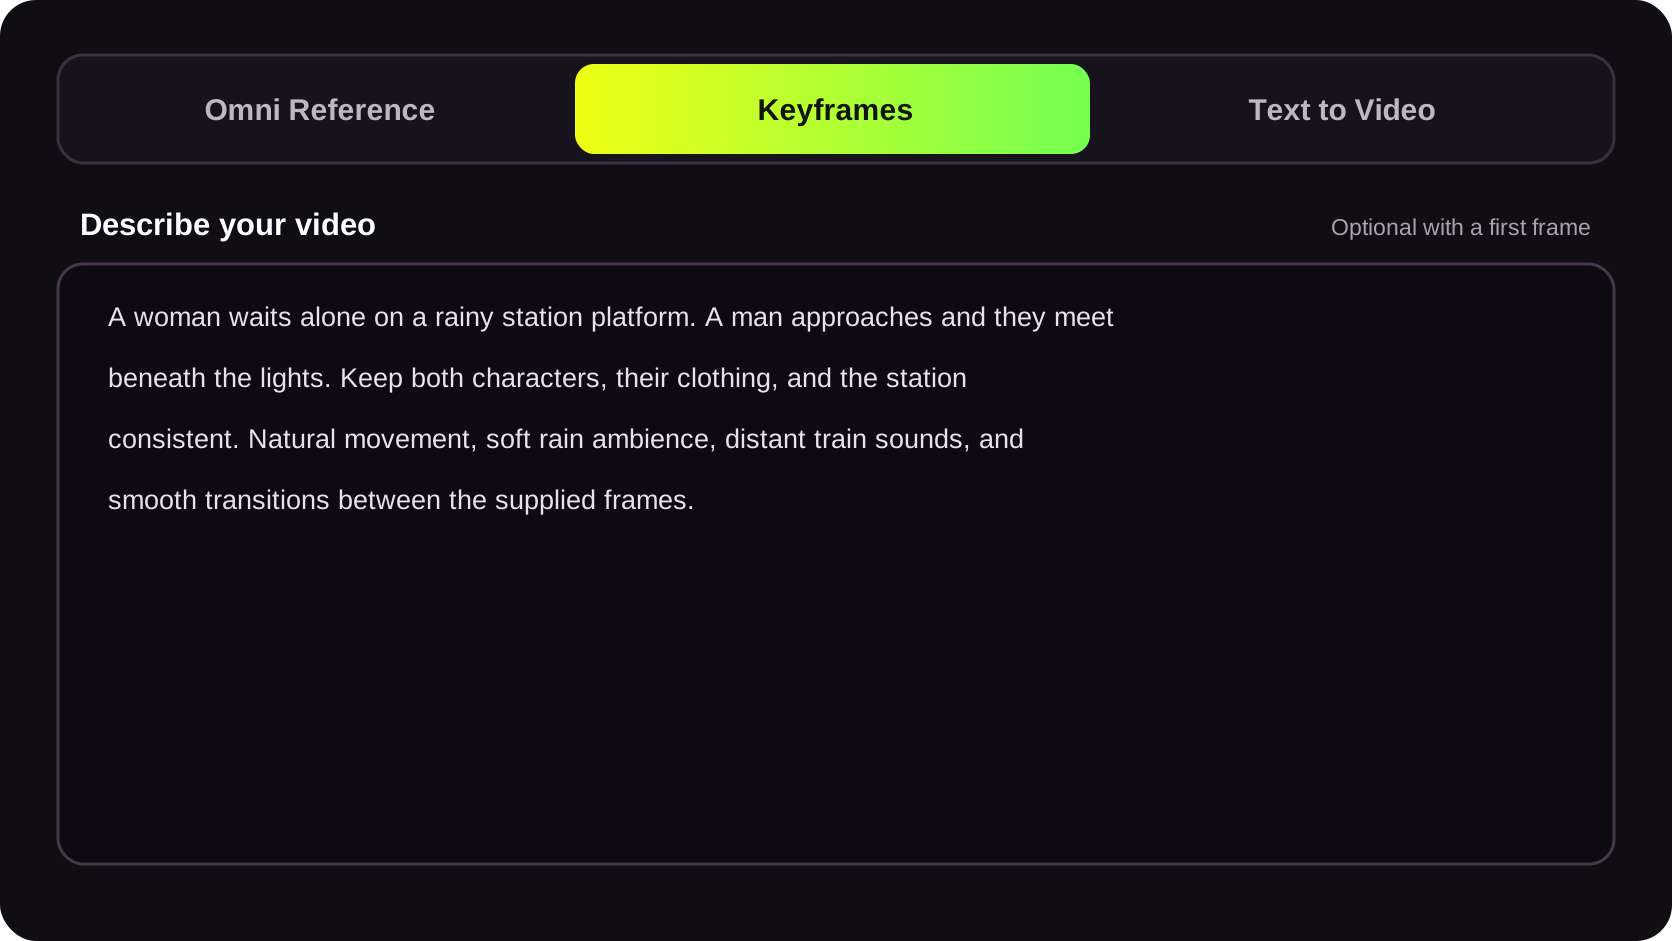
Select Keyframes. Describe the reunion, the characters, and the movement between the images.
2
Upload the opening, middle, and ending images in order. Keep the characters and station recognizable across all three.
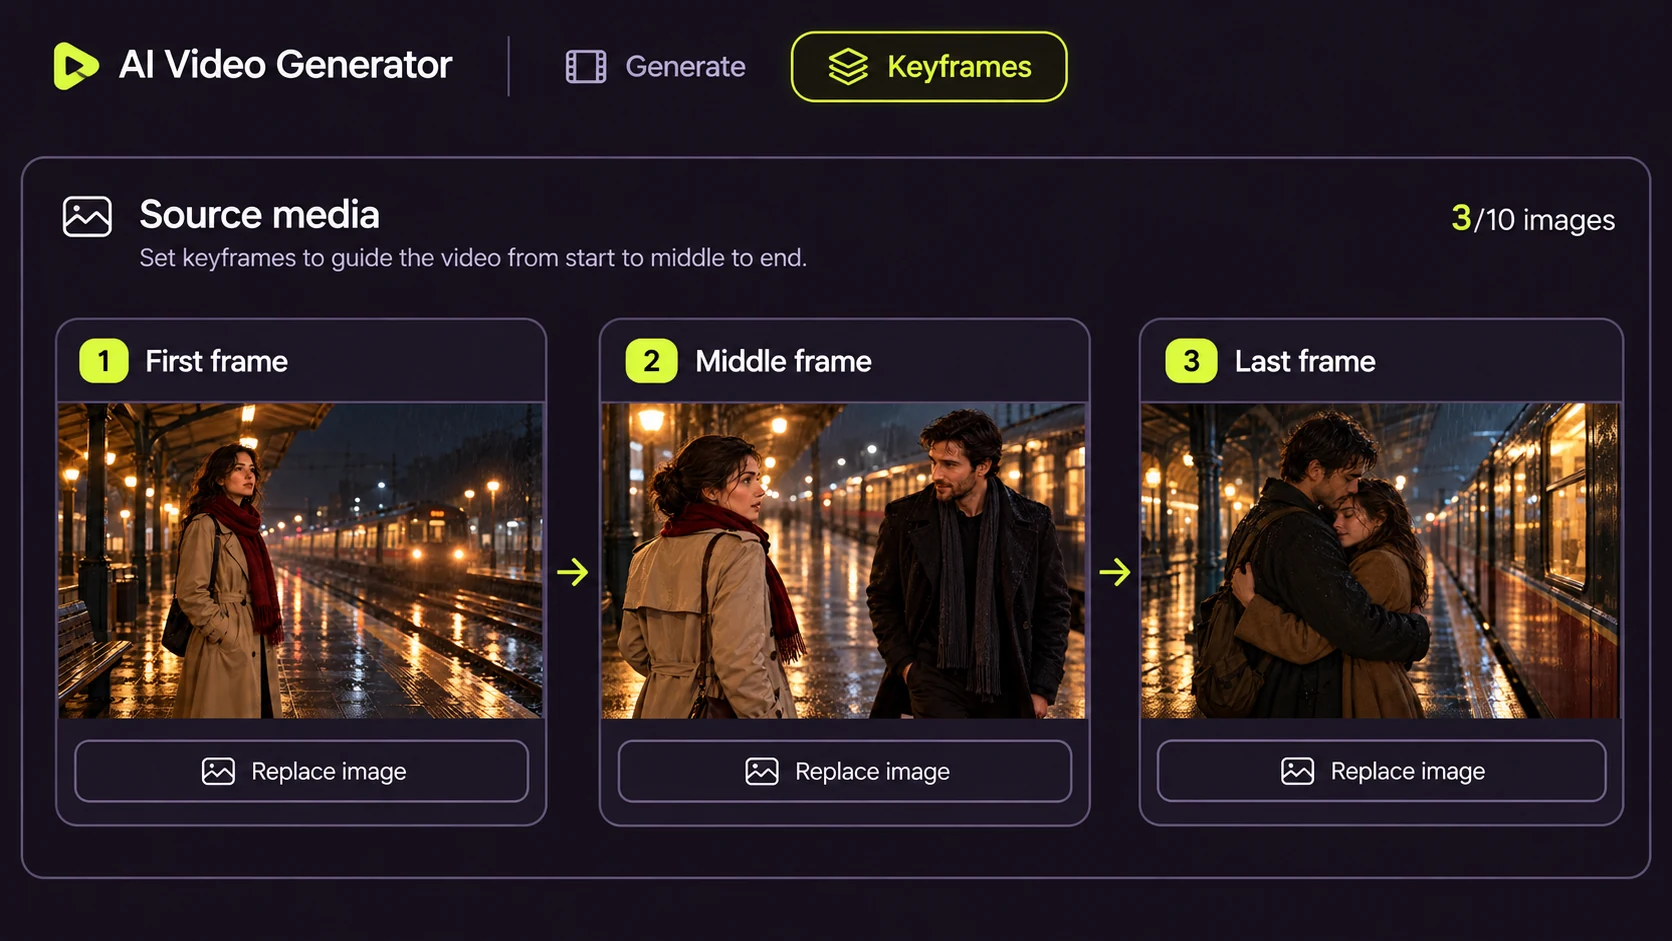
3
Choose 22 seconds and 720p. The video follows the first frame's aspect ratio. Check the estimated 110 credits, then generate.
4
Play the finished story. Check the characters and transitions, then download the video.
The generator uses the frames in order. You can guide the movement in your prompt, but cannot assign an exact timestamp to a middle frame.
Use this keyframe exampleBeginner Walkthrough
Example: Coastal Bicycle Ride · Text to Video · 8 seconds · 16:9 · 720p
1
Select Text to Video, then describe the cyclist, camera movement, setting, and sound. No source image is needed.
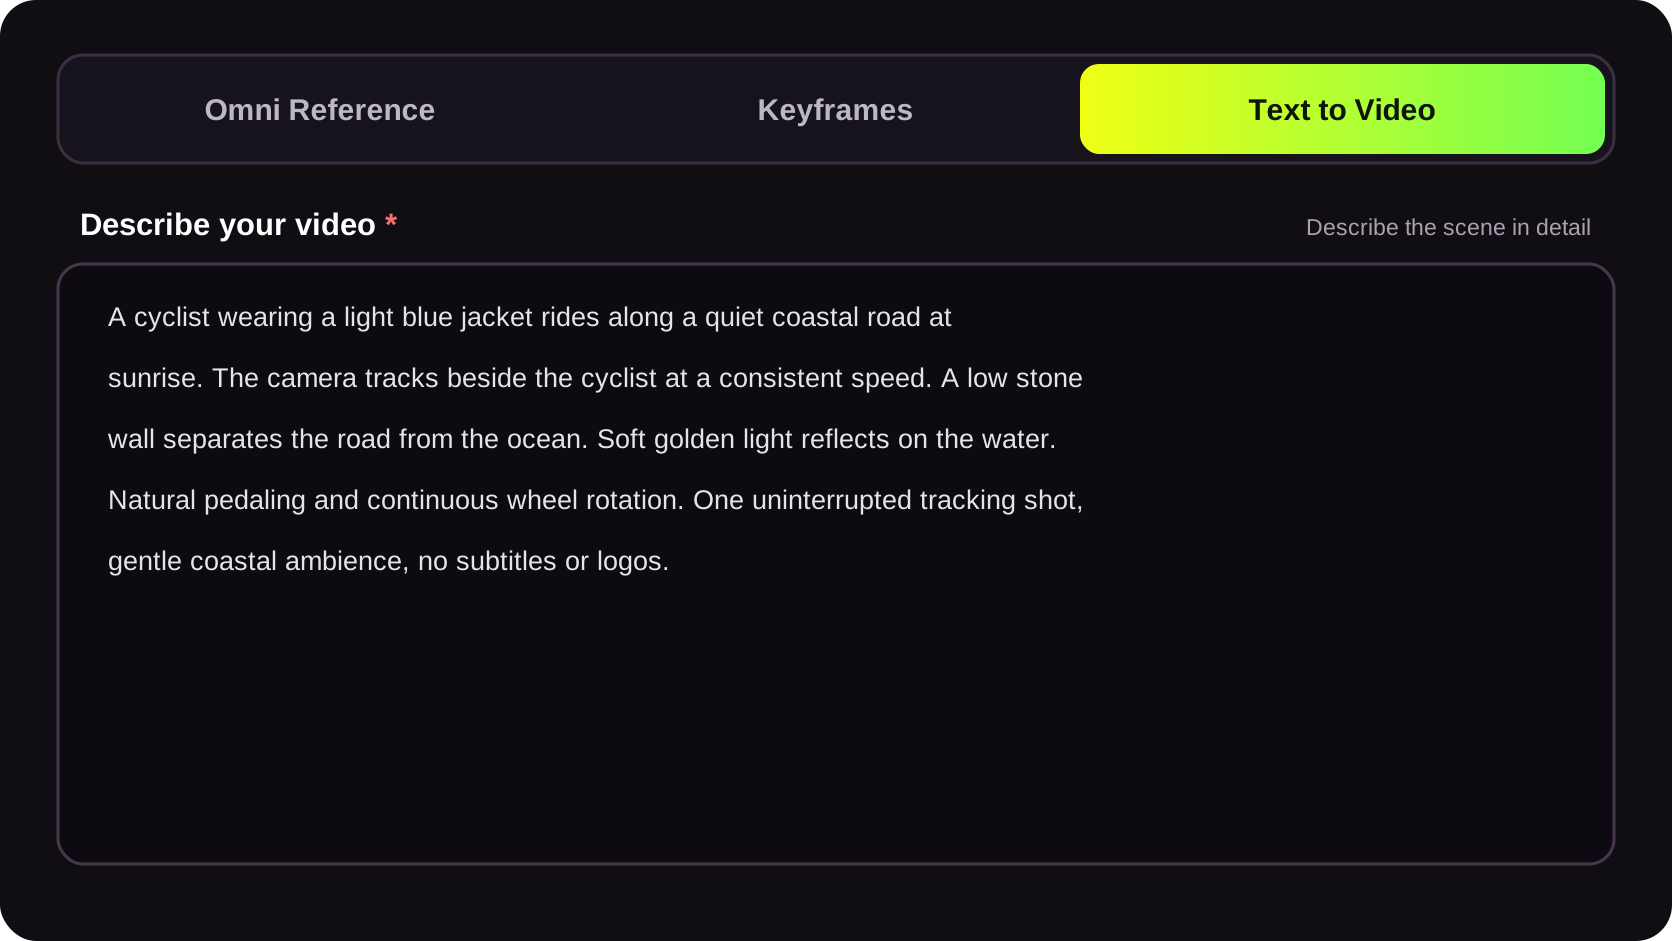
2
Set 8 seconds, 16:9, and 720p. Check the estimated credits, then select Generate Video.
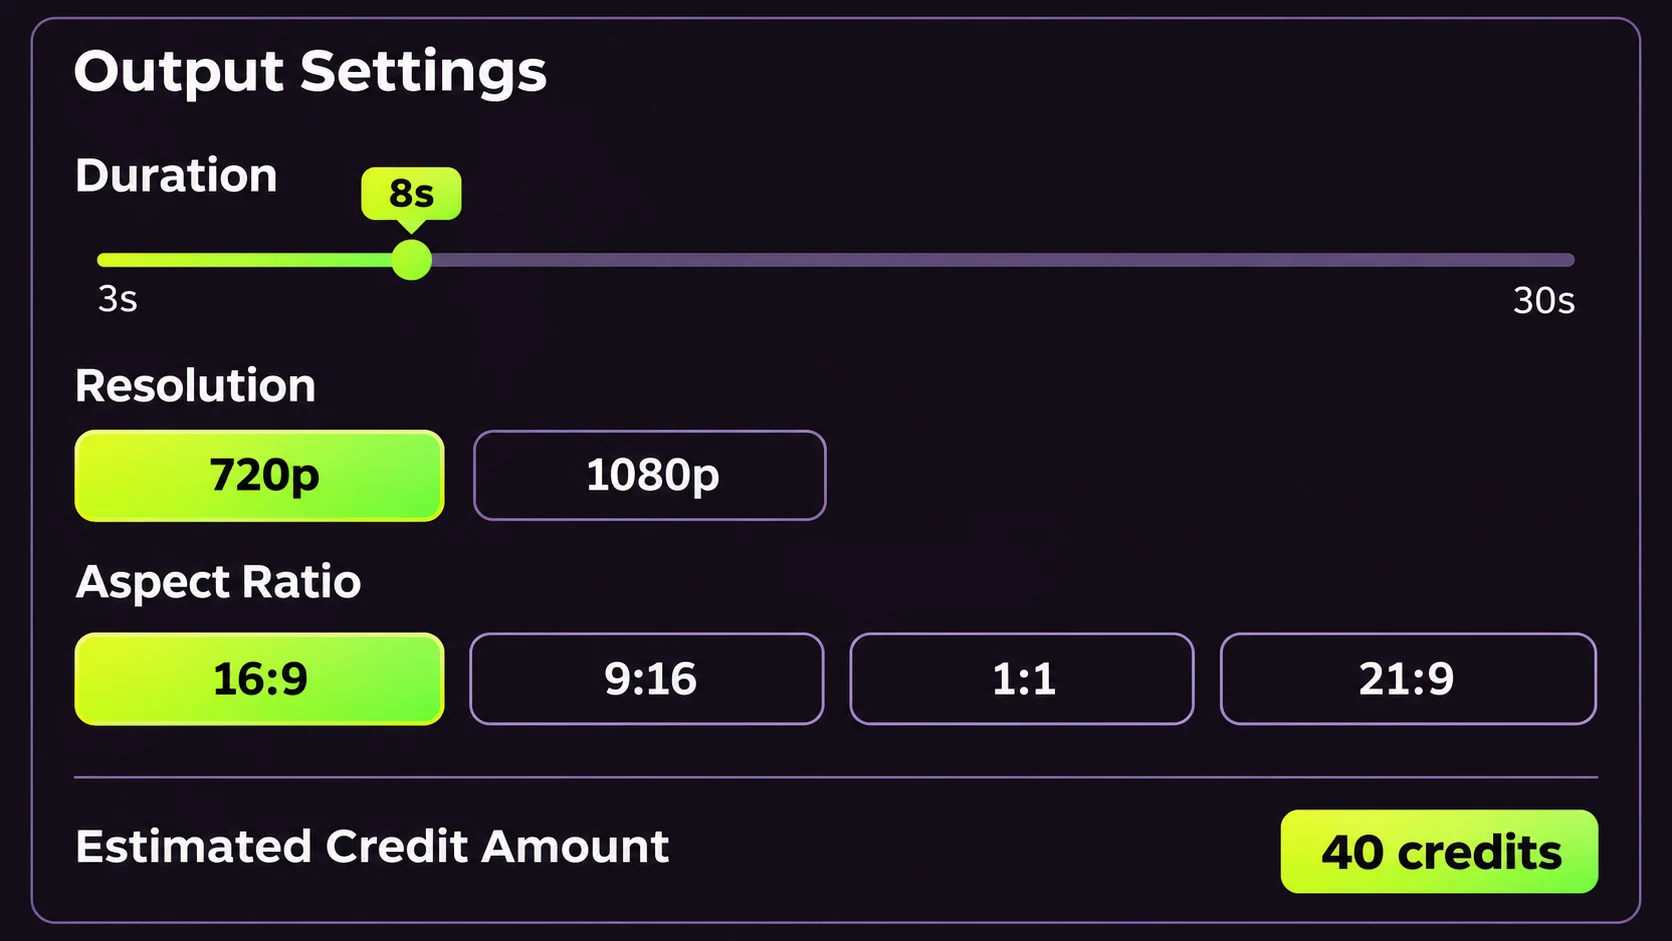
3
Once it is ready, play the result, check the cyclist and camera movement, then download the video.
If the camera moves too quickly, ask it to track at the cyclist's speed and maintain a steady side view. Each new generation is a separate task and may use additional credits.
Use this text exampleImage and Voice References
Follow a pour-over coffee example from prompt and source media to a finished 15-second video.
1
Describe the barista, the pour-over sequence, and the spoken line you want in the video.
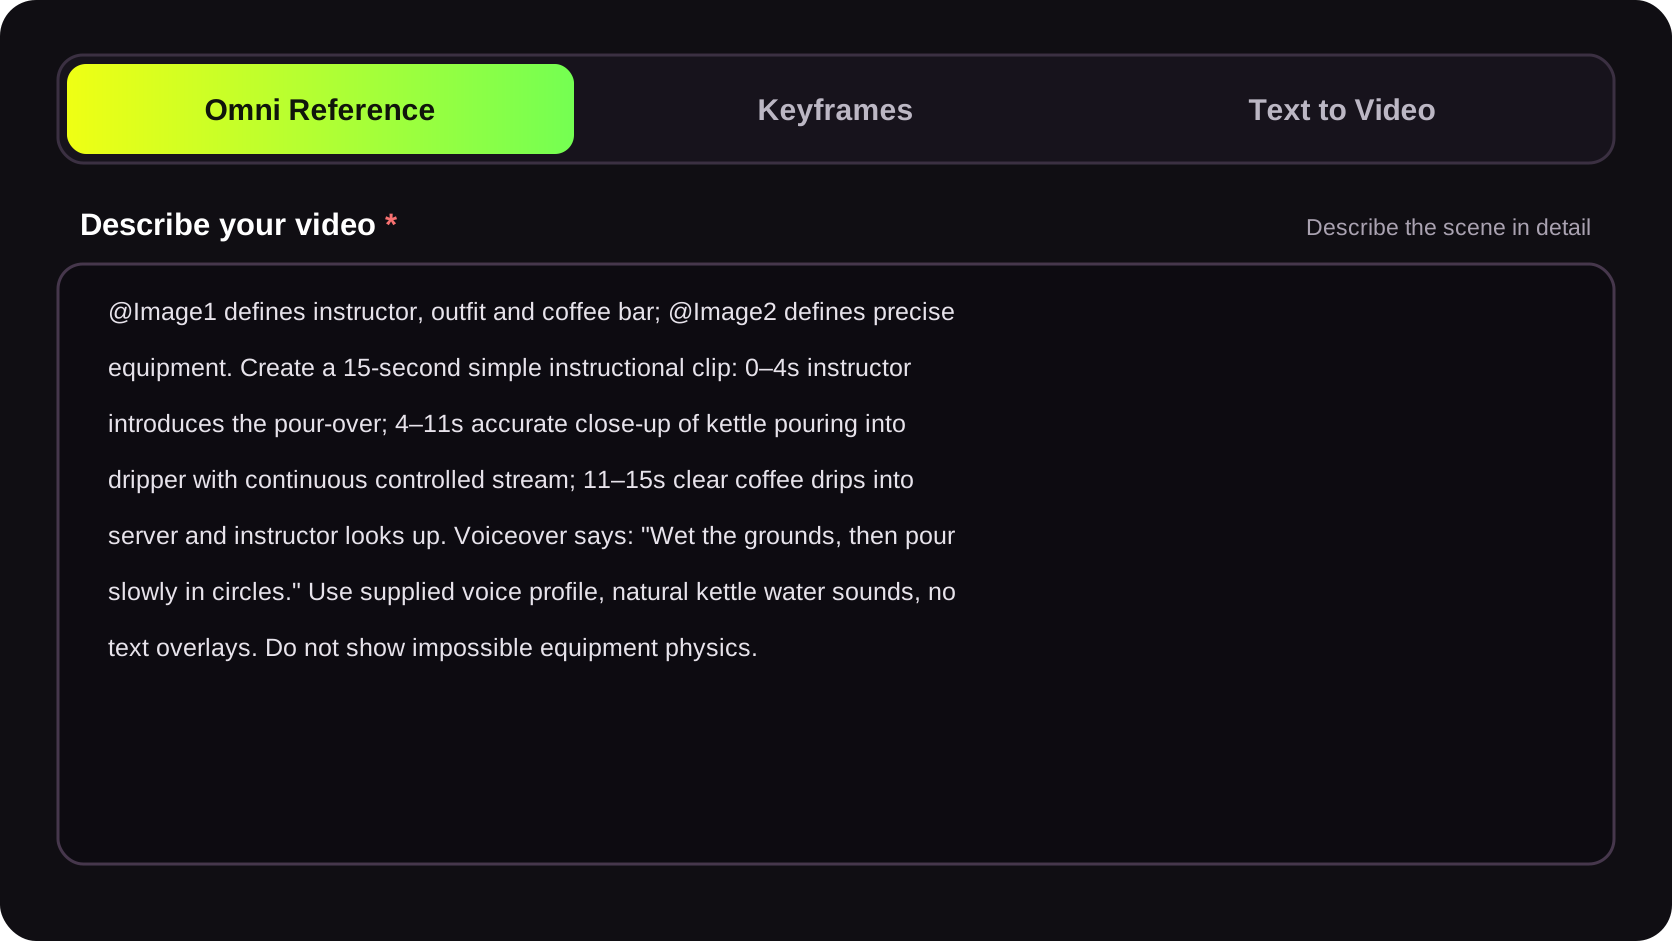
2
Add the barista and equipment images, then upload the voice sample to guide the spoken line.
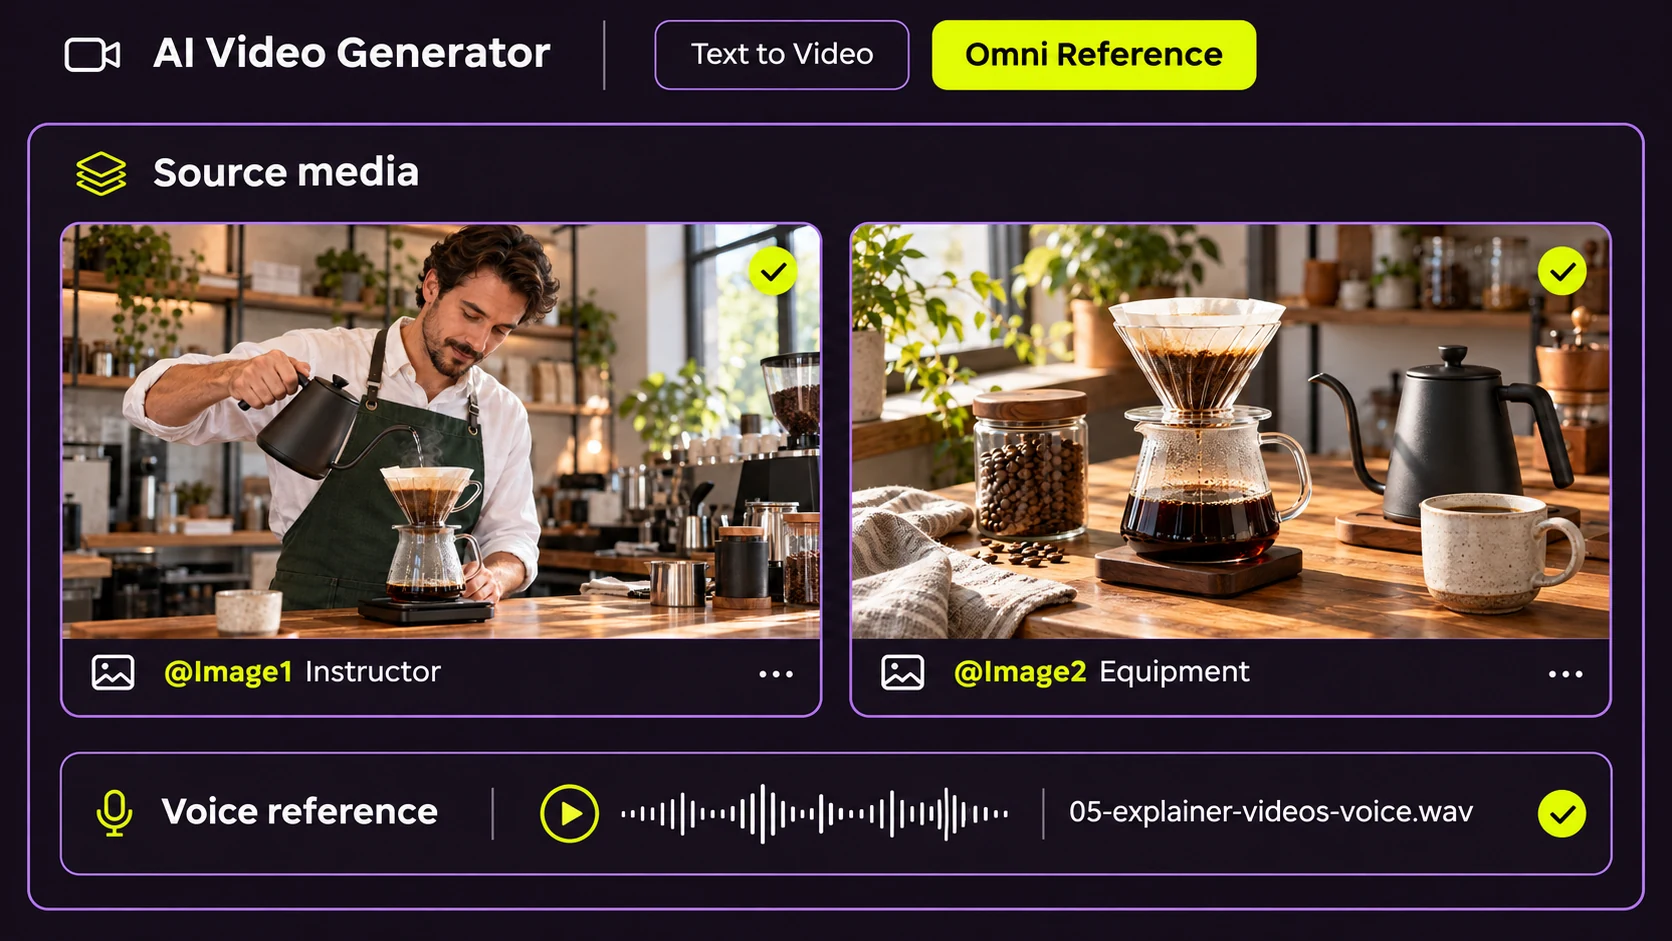
3
Choose 15 seconds and 16:9. Voice references require 720p. Review the estimated 75 credits, then generate.
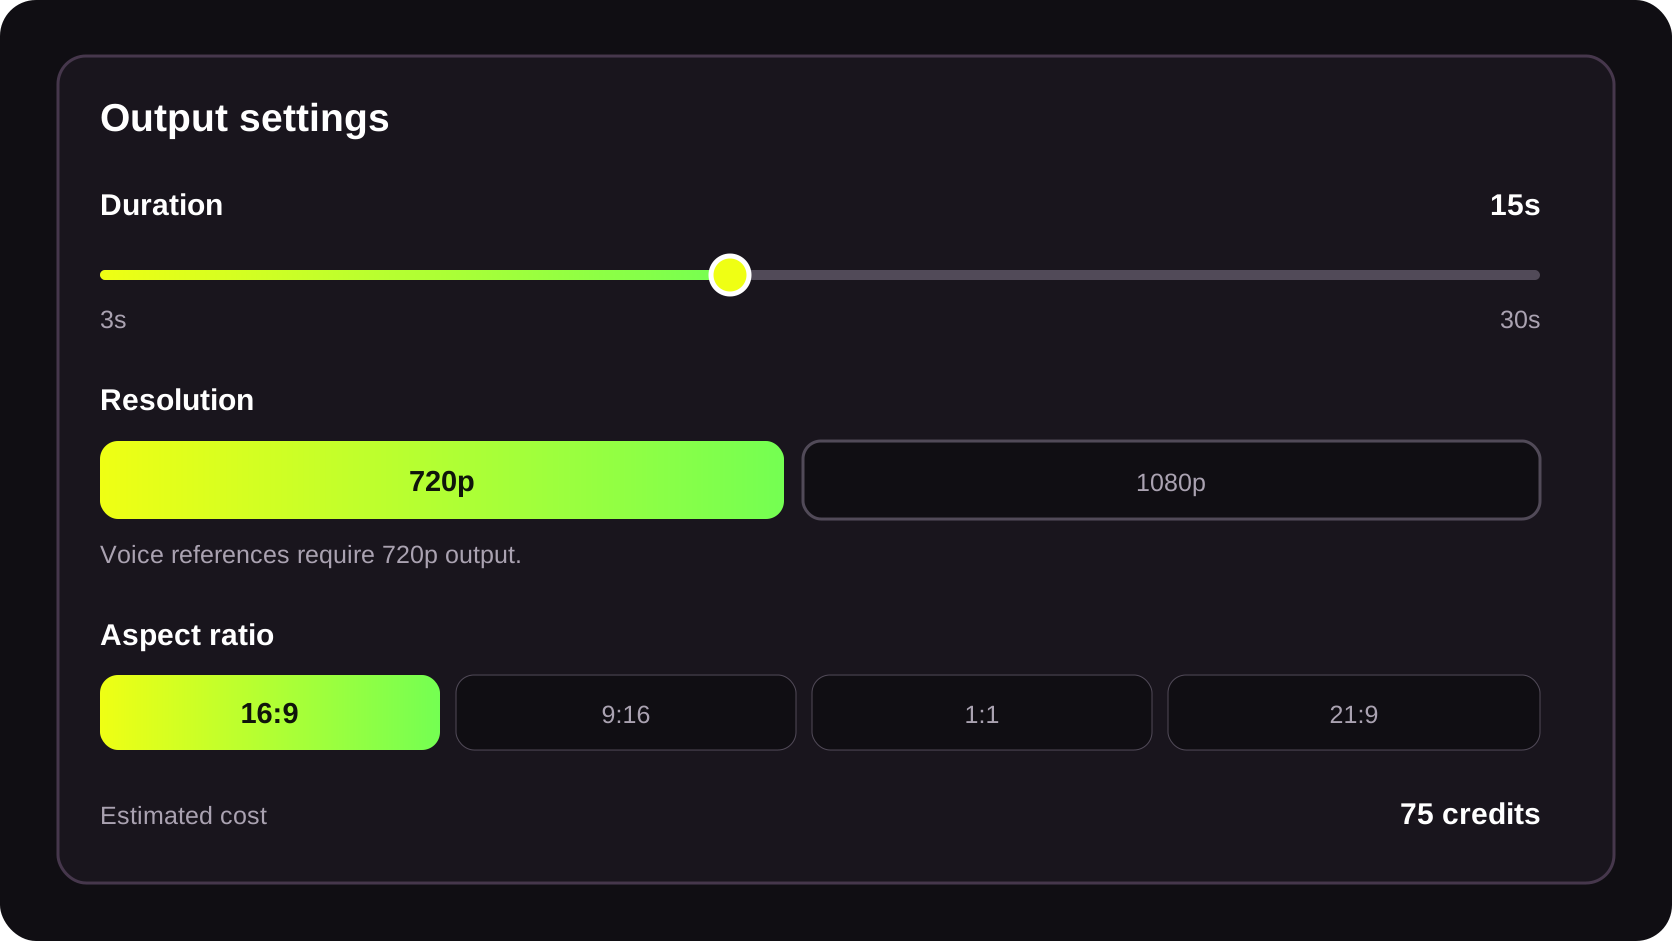
4
Play the finished explainer, check the action and voice, then download the video.
Troubleshooting
Find the specific issue before rewriting the whole prompt. Change one input or instruction, then compare the new result.
Use clearer reference images. Name the hairstyle, clothing, or facial details that matter. Remove conflicting references.
Describe one main movement and explain where the camera starts and how it moves relative to the subject.
Reduce the number of actions or choose a longer duration. Use Keyframes when important moments need visual guidance.
Use a clear product photo and name the color, shape, texture, and design details to preserve.
Keep spoken lines short, identify the speaker, and describe ambience separately. Voice references are not finished soundtracks.
Check that the selected mode accepts its format, size, dimensions, and duration. Check requirements again if you change modes.
Check task status, input requirements, and credit balance. If reserved credits do not return after a failed task, email support@kling-4.art with the task details.
Common Questions
Answers to common questions about choosing a mode and using credits.
Yes. Choose Text to Video and describe the scene in a prompt.
No. They are separate generation modes. Choose Keyframes for planned visual moments or Omni Reference for source images, video, and voice.
A new generation is a separate task and may use additional credits. The estimate appears before submission.
Your next step
Start with a simple prompt, add references when you need more control, and create a video you can review, refine, and download.
Still choosing a model? Compare Kling 4.0 and 3.0. For more prompt ideas, browse the AI video blog.